
Signing your Advance Directive can be easily completed after a few steps. We have outlined the exact steps needed to successfully sign your Advance Directive below.
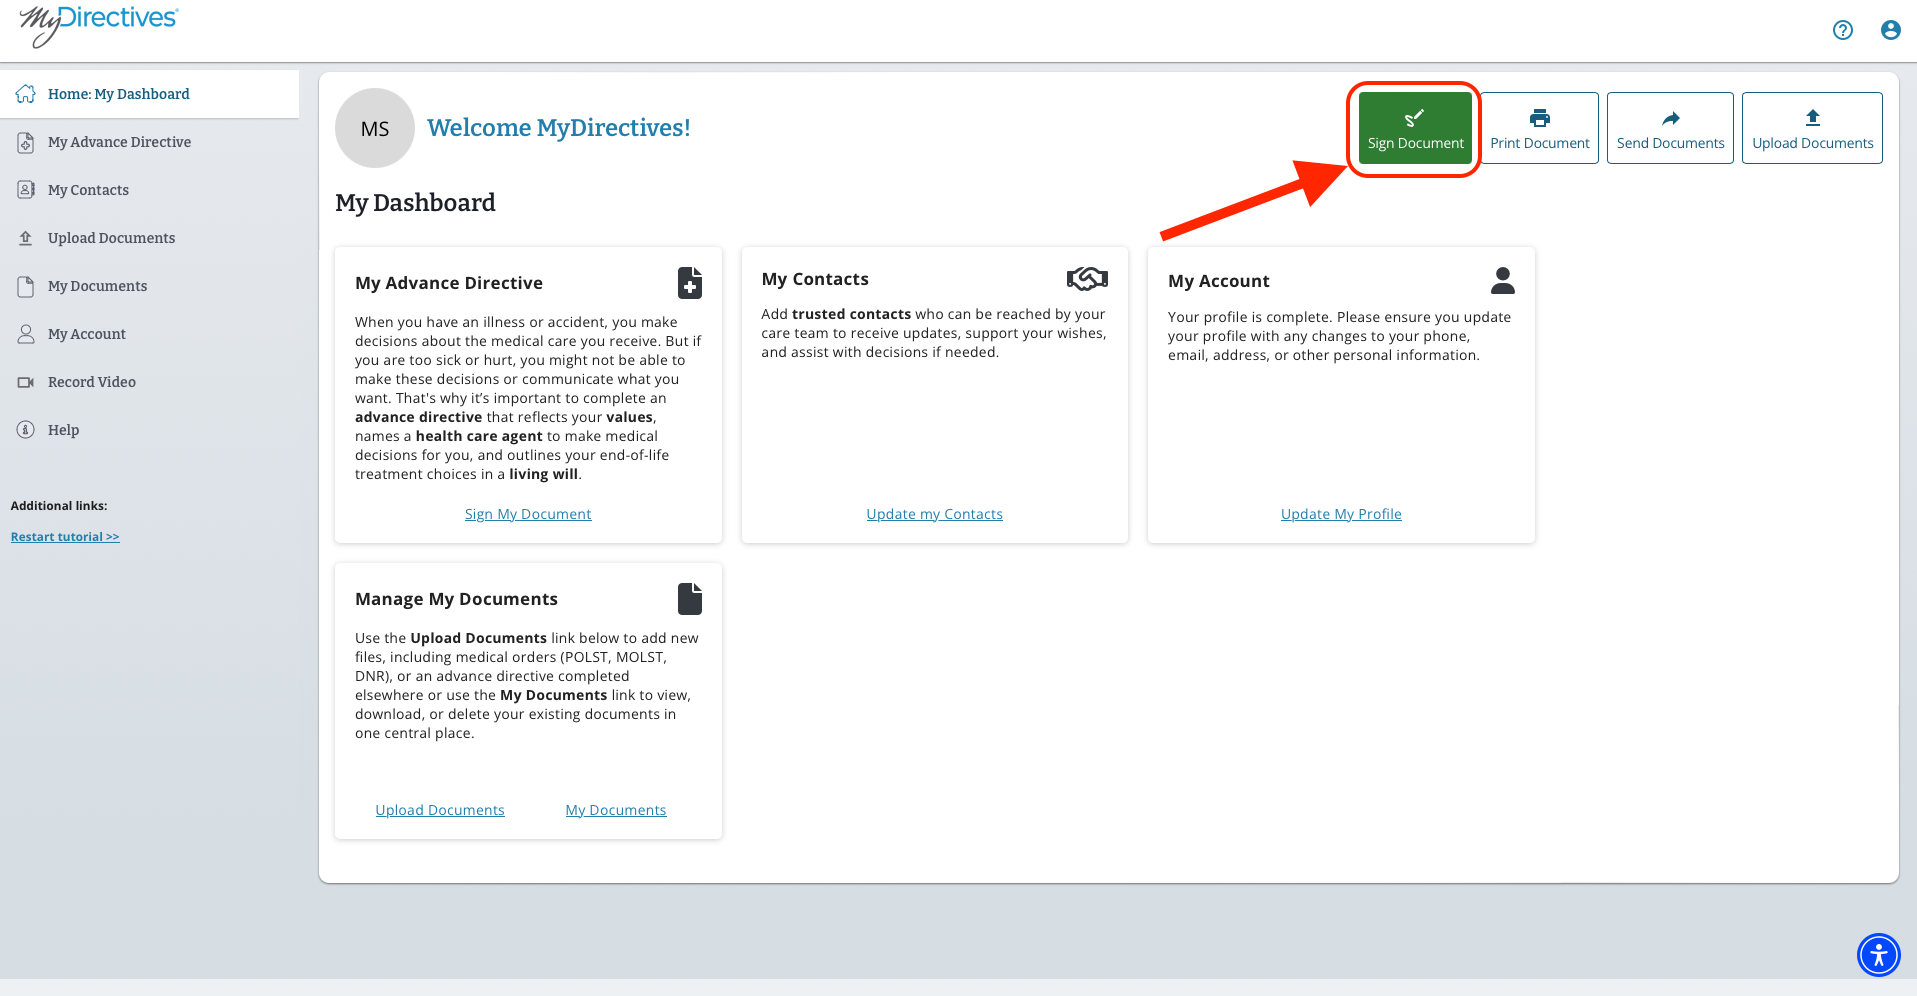
1. Beginning in your dashboard, you will need to click on the green Sign Document button to get started with the signing process.
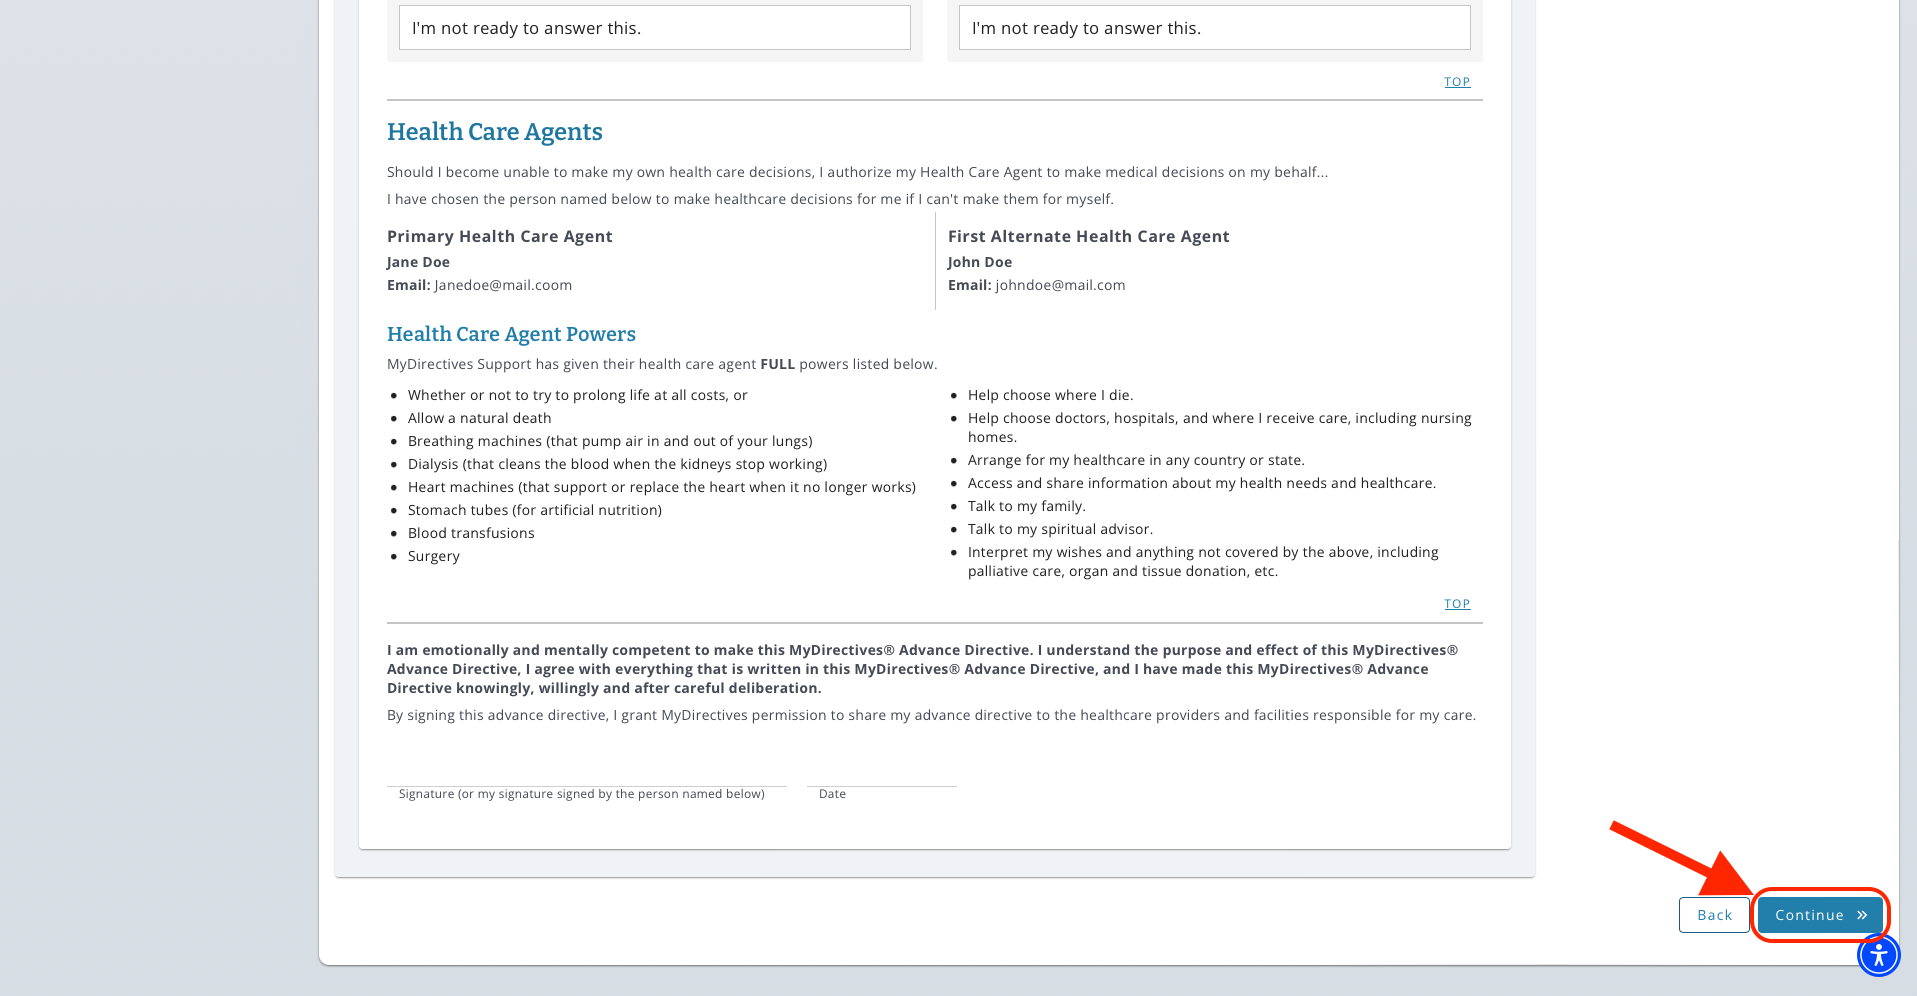
2. Here you will be able to review your document in its entirety. Once you have reviewed your Advance Directive, click on the blue Continue button at the bottom of your page to be taken to the next step.
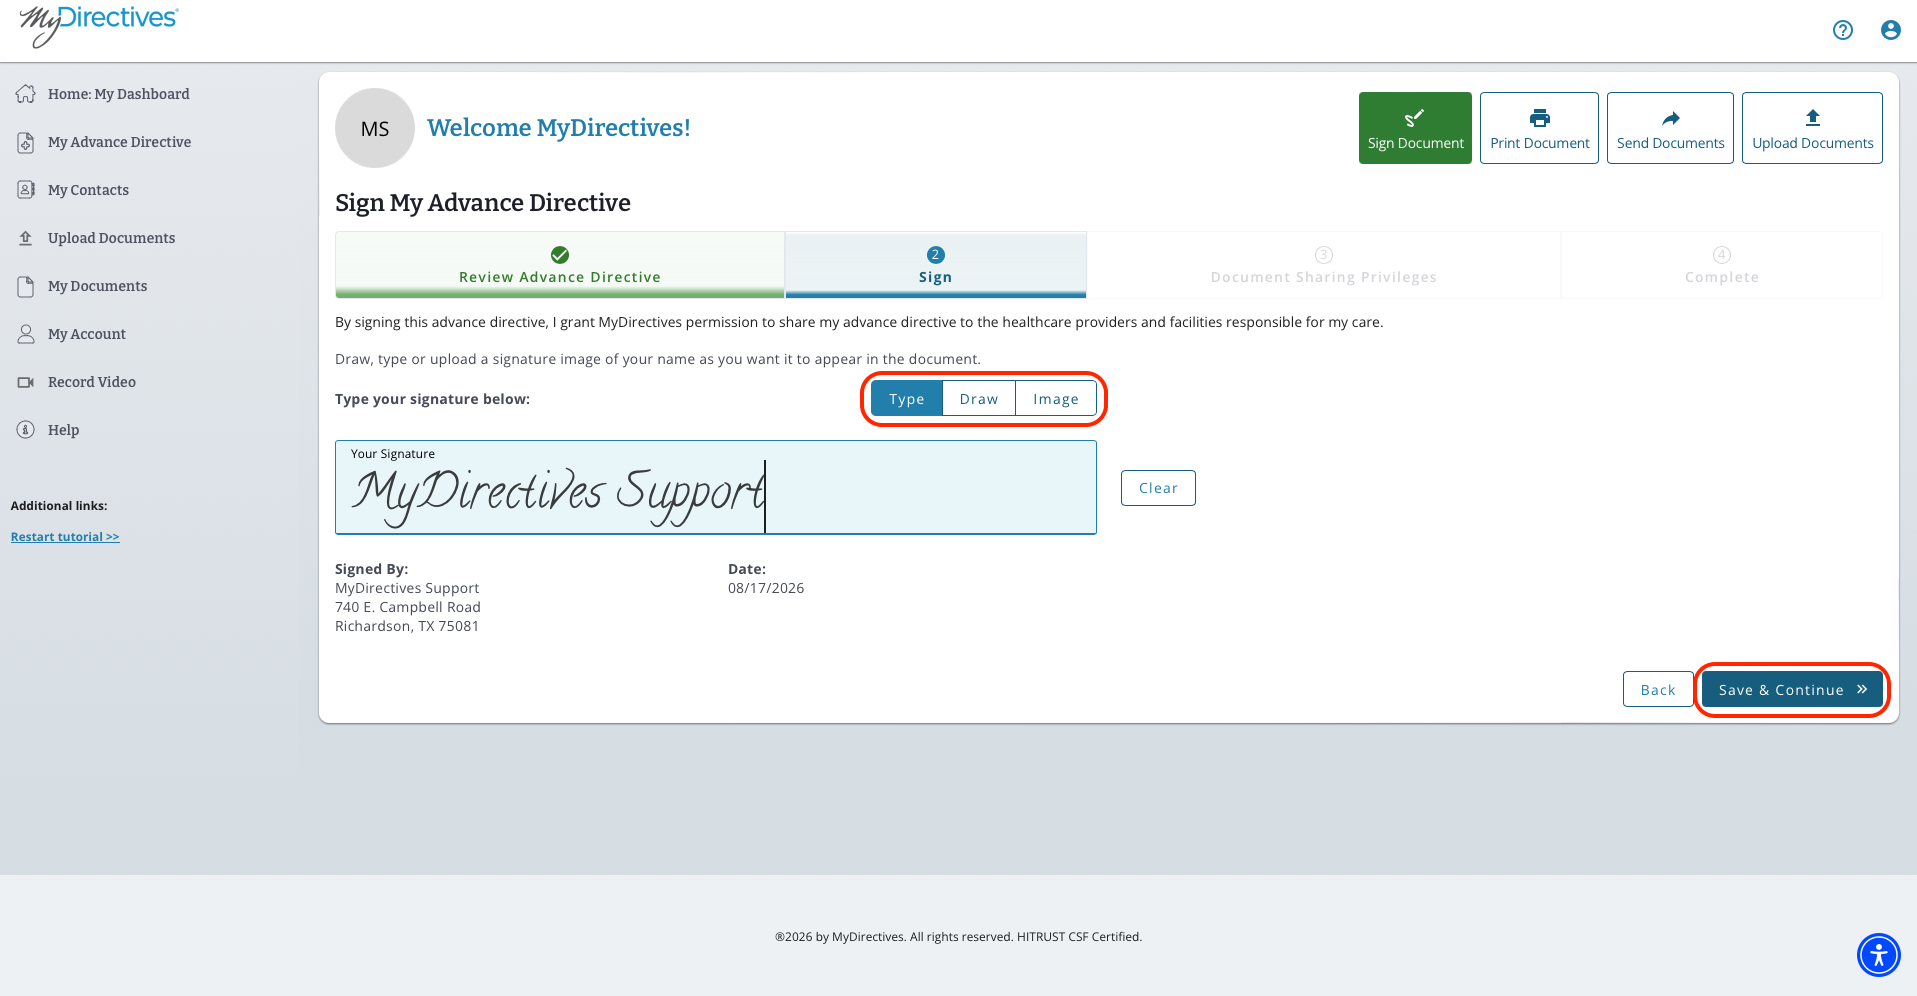
3. Here you will enter your signature by either Typing, Drawing, or uploading an image of your signature. Once you have entered your signature, you will click on the blue Save and Continue button to follow the next step.
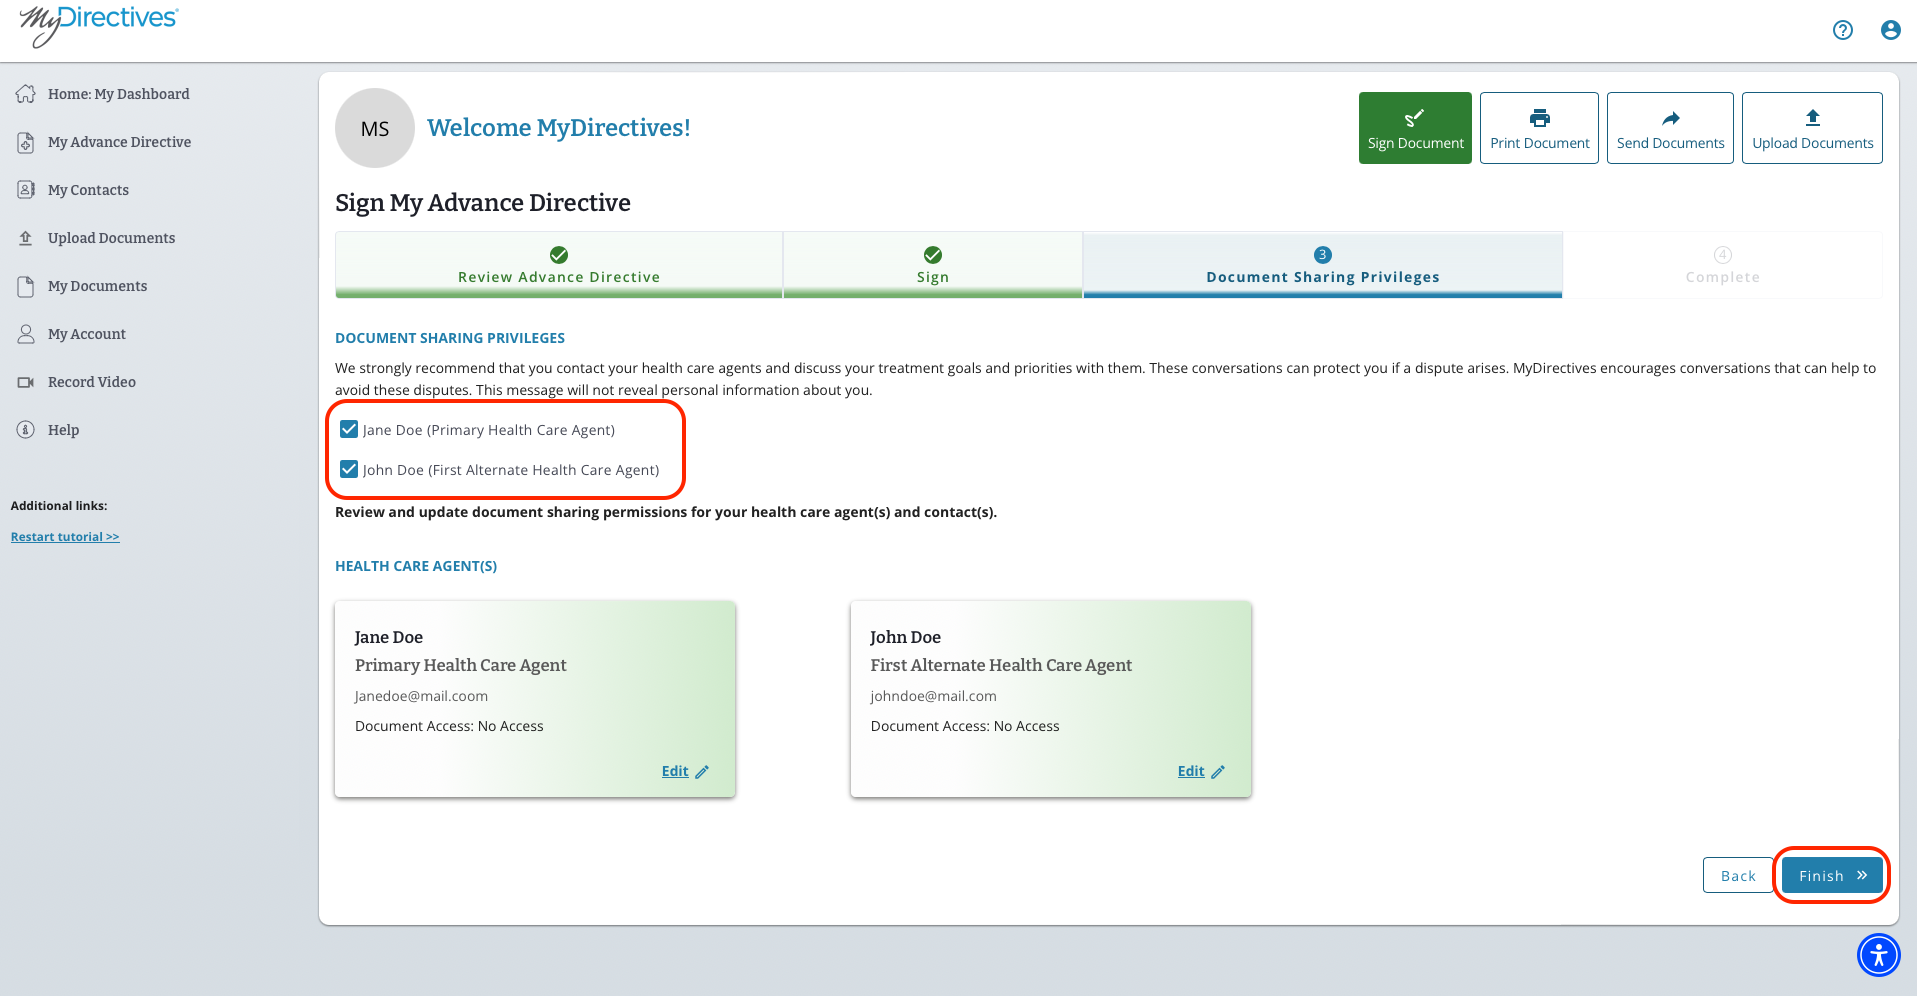
4. Now, if you have designated a Health Care Agent, this is where you will be able to choose if you would like them notified of their role. After all your choices are made (if any are needed) please click on the blue Finish button.
Congratulations, you have completed and signed your Advance Directive! Your Advance Directive is now accessible by healthcare providers in the event of a medical emergency.